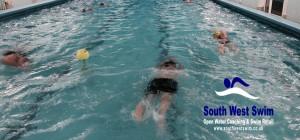
At South West Swim we have just completed the second week of our winter technique pool sessions. These are sessions that run weekly (twice a week) from October through to April with a massive focus on technique in the swim, and some open water skills and group video analysis. Even after 2 weeks I am already seeing athletes (of all levels and ability) changing and improving their swim strokes in the sessions. Some of these swimmers are new to a coaching environment (and fairly new to swimming) and some are fresh from successful seasons of Open water and Triathlon events, from short swims and marathon swims through to Ironman finishers and ultra endurance athletes.
 A key ingredient to the start of your winter training is to bring focus back to the movements that are performed in the water, your body position and the feel for the water. There is little point jumping straight into the pool and swimming length after length, or drill after drill if the correct primary movements are not there. Over the summer months you may have also got into some bad habits, especially for those wearing a wetsuit, as for most wetsuit swimming is MUCH easier. The downside to this easy swimming is that you will notice these habits when you take off the suit and jump back into the chlorine tank, swimming may become harder and the athlete disillusioned with their skills, not a great start mentally.
Our first couple of sessions back in the pool were specifically designed to break these habits and provide a little wake up to the body and gaining some mental focus. Getting our thoughts back into great form, good body position, streamlined kick and body alignment (without the safety of a wetsuit) was top of our list of things to achieve to enable our training to be productive and effective.
So how do we do this? Our first session purely focused on body position in the water, here are a few practice ideas for you to get that feel back:
- Floating – Yes, just floating. A very effective drill to get the focus back into your core and how your body reacts in water, are you a sinker or a floater? To perform this drill we simply align ourselves in a streamline position and float face down, use a centre snorkel to breath as it makes life much easier. First perform the drill with a pull buoy between the legs, floating for around 20-30 seconds, this should be relatively easy and resemble the buoyancy sensations of a wetsuit. The next part of the drill is to take the buoy away and perform exactly the same practice without the buoy. Notice if there is any imbalance in the position, do you start to roll to one side? do you sink? can you get into the streamlined position (i.e. do you need to work on flexibility)?.
Try to engage your core muscles and fine tune your position in the water to stay flat. These are very basic movements which can be tricky to achieve at first. - Paused Torpedo kick – A step up from our floating drill we are now introducing our legs to the party. Push off from the wall in our streamline position and float until nearly still, then start to move the legs for 5 seconds or so, then complete the length full stroke.
- Torpedo kick – As above but without the pause and a longer kick phase, try pushing off and kicking for half a length, then full stroke.
- Head position Drill – I always mention this and it could not be more true, your head position is very individual to you! A lot of the athletes noticed slight tweaks needed to be made between their wetsuit and non-wetsuit head positions Try our head position drill in your swim, you may be surprised by the results.
Swim one or two lengths at a time in each of the following positions, this test may not be suitable for you if you have neck or back problems, please take care:First – Swim with your head down, almost with your chin touching your chest. This position is an extreme and not really a proper swimming position. I include this so the swimmer can feel what it does to their body shape in the water. Most usually complain that is it not comfortable and hard to rotate / breathe. Again, take care doing this if you have any problems associated with the neck, back etc.Second – Swim with your eyes looking straight down to the bottom of the pool.Third – Now swim with your head facing forwards, goggles under the water, so that you can effectively see the end of the pool.Fourth – Now swim with your head in a position between the two. Start with your head down looking at the bottom then move your chin slightly forward. Your eyes should be able to see around 1-2 metres in front of you. You should NOT be able to see the end of the pool.Note how each of these positions felt to you. The first position is strange and can make your legs higher, or lower in the water (yes, it can strangely make some swimmers legs sink. going against the grain). The second position should bring your body position higher in the water, the third should sink your body and legs. In most people I have coached the fourth position is the most popular and gives a good degree of balance in the stroke and also buoyancy. It is also a great open water position as it makes sighting low to the water easier.Lastly swim a few lengths in your favoured head position and try to tweak it around slightly, seeing what is comfortable for you individually.
All of the above practices and drills are focused on getting a great body position, introducing our legs to the equation and feeling the water and the swim. The better your position in the water, the less drag you will create, the more efficient you will be, the longer you will be able to swim and the faster you will be. To aid your body position do not use a kickboard when performing these drills, as this will lift you at the front (thus sinking your legs or arching your back) and not provide a true position in the water.
The above drills may seem very basic to accomplished swimmers but these basics are essential to get right, whatever level you are at. For example, I have seen video of the floating drill performed at one of the leading swimming clubs in the country. If it is good enough for Olympians and up and coming stars of the aquatic world then we should all be able to see the benefits.
I believe it’s also important not to lose the feel for wetsuit swimming in the winter, if your pool allows pop the wetsuit on now and again and do a small part of your session with the suit on, try some of the drills mentioned above and you will feel a difference.
Just try to avoid wearing the wetsuit on CSS testing day (mentioning no names here) :).
Get the basics right and you WILL be faster, give the above a try in your next session.
Pool session note: South West Swim technique sessions are pool based between October – April on Tuesday & Thursday evenings, we also have a year round Sunday squad session that runs at 4-5pm. Due to demand we may be looking at increasing these times in the near future with an additional hour on Sundays and Thursdays (Possibly Tuesdays). April to September sees our weekday squads move to open water.
